You are using the Epson R1900 printer series and you have the issue with the Waste Ink, Epson printer uses the Waste Ink Counter to prevent the waste ink from overflowing, the Waste Ink Counter will be full of ink after you print a large of documents, this limit raise up from 0% to 100%, when the Waste Ink Counter is equally 100% or more, the printer will stop printing instantly to sure that the waste ink isn’t able to overflow into the Waste Ink Tray. The signals for this position are the twice red light flashing and send the notification “The Printer’s Ink Pads are at the end of Their service life. Please contact Epson Support”.
In case the printer is new, the Waste Ink Counter will be installed to reach 100% before both the waste ink pad and the waste ink counter raise up.
You can find the application that is provided by us on the formal website, this software called WIC RESET TOOL has the function to take the Waste Ink Counter back to 0%, you can reset Epson printer’s Waste Ink Counter by yourself based on the solution on the website, when the resetting is complete, your Epson R1900 printer can continuously printing.
If you are using the new printer, you can’t be worried because the Waste Ink Counter can’t overflow but for the old one, if you don’t clean the Waste Ink Pad after the first resetting process, your Epson printer can be damage because of the overflowing waste ink. The waste ink can also overflow out of the printer anh make your table dirty.
In order to reset the Waste Ink Counter you need to take all the waste ink out of the tray then use the skills to open the printer.
You don’t need to disassemble the components and check regularly to prevent the waste ink from overflowing depending on the better solution called WIC RESET TOOL.
Avoid Waste Ink Counters and Waste ink Pad Overflow.
You should understand and find information clearly to know more about this problem and it’s necessary to find out some working principles of the Epson Printers.
What is waste ink counters? Waste ink counter overflows?
1. What is Epson R1900 waste ink counter overflow?
Epson inkjet printers have inside a part of sponge for absorbing and collecting waste inks. It is called waste ink pad.
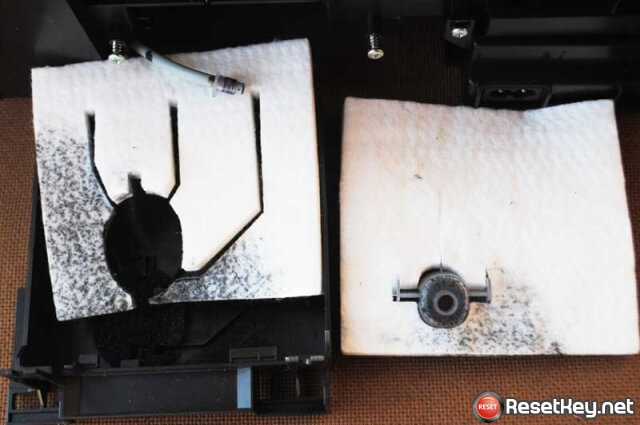
Waste Ink Pads are a number of porous pads in the inkjet printer that collect, distribute, and really importantly include the ink that is not used on printed pages (Waste Ink).
Waste Ink is collected by these pads during the initial setup of the product, during cleaning cycles and when printing borderless photographs.
Anytime printhead cleaning process ink flush via printhead to waste ink pad. Then once it may be overflowed because it cannot absorb ink any more then the ink are going to leak from the bottom of the inkjet printer.
The printer counts the volume of ink flow to waste ink pad and then stores this amount into printer’s memory ==> This number is named Waste Ink Counter.
+ To stop ink leaking outside the Epson R1900 printer the waste ink counter might be overflowed and Epson R1900 inkjet printer will stop.
+ Full counter is 100%. Waste ink counters overflow means that counters values are more than 100%.
To get Epson R1900 printer printing again – You must to RESET the Epson R1900 printer Waste Ink Counter (Read more to learn how to reset epson printer).
2. How to know that your Epson R1900 printer waste ink counter overflow?
+ Your Epson R1900 red light flashing
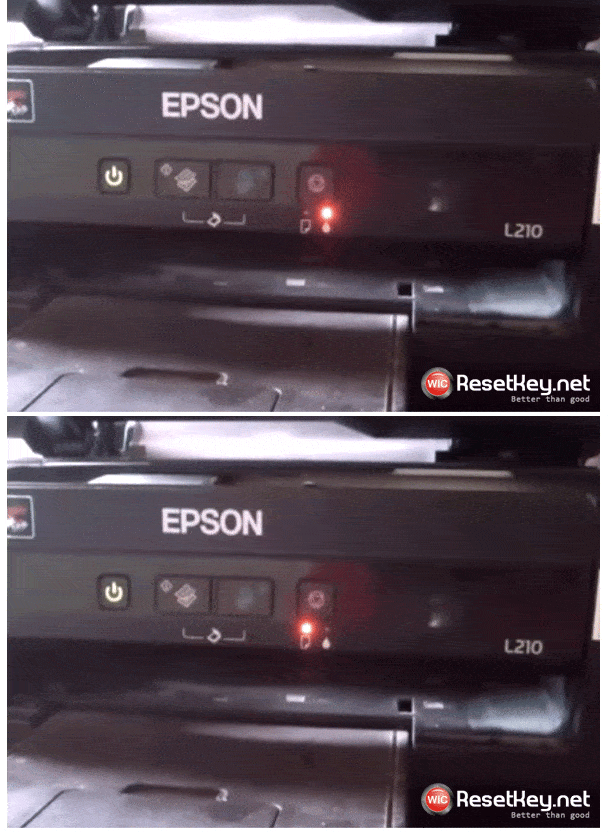
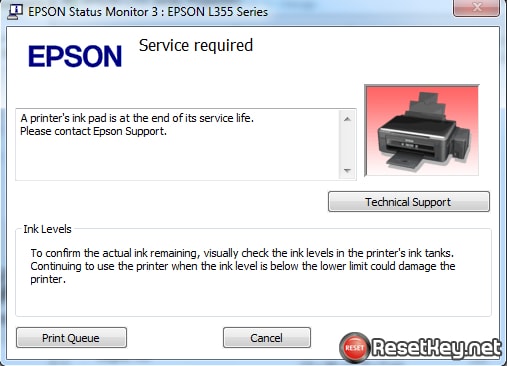
+ Your printer LCD screen or computer screen appear: “The Printer’s Ink Pads are at the end of Their service life. Please contact Epson Support” or “The Printer’s Ink Pad is at the end of Its service life. Please contact Epson Support”.
+ It is very easy to check Epson waste ink counters with WIC Reset Utility.
Step 1. Download WIC Reset Utility Tool here: Download WIC Reset
Step 2. Run WIC Reset Utility, Click on READ WASTE COUNTERS button:
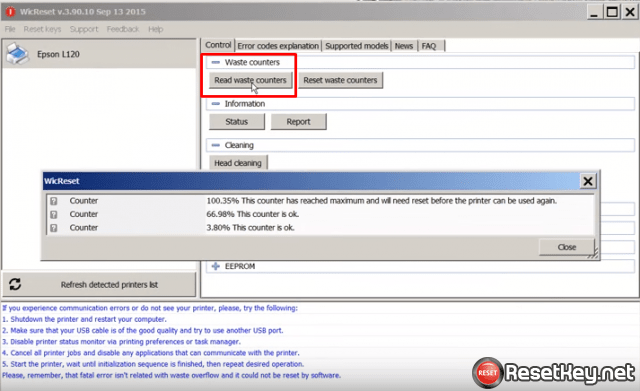
Step 3. Watch the result. If one or two counters are more than 100% (overflowed) – you can not print – you have to RESET WASTE INK COUNTERS number
3. How to fix Epson R1900 waste ink counter overflow?
Step 1: Download WIC Reset Tool and install the software
Step 2: Buy the WIC RESET KEY
Step 3: Reset your printer with WIC Reset and WIC Reset Key
+ Connect your printer to computer that you installed WIC reset. Connect computer to Internet.
+ Follow this article and reset your Epson R1900 – Read how to reset Epson R1900 printer
=> Tips how to avoid Epson R1900 printer Waste Ink Counters overflow: Read here
How to avoid Epson R1900 printer Waste Ink Pad overflow?
When you apply all the detail hack Epson R1900 printer’s waste ink pad. We provide you about the problem called Waste Ink Counter bellow, You can find different location of the Waste Ink Pad in different Epson printer series.
Let’s see some information we give you here to know more. The waste ink normally flows from the waste ink tube to the Waste Ink Pad then the sponge in this having the fucntion of collecting the waste ink from the Epson R1900 printer. However, when the sponge such a lot of waste ink after a long usage period, it is not able to absorb anymore.
There are many solutions for you such as replacing the Waste ink Pad or using something to suck all the waste ink, you can also follow the waste ink to a bottle that can contain the waste ink during the printing procedure. You can set your mind at rest that your Epson R1900 printer will not overflow the ink, everything you need is bring the bottle to pour then clean it.
Please follow these steps to allow the waste ink flow into the alternative bottle:
Step 1: Checking and open the cover of Epson R1900 printer’s waste ink pad:
Let’s see the cover by turn the printer, as you can see in the picture the small cover, this is the waste ink pad’s cover.
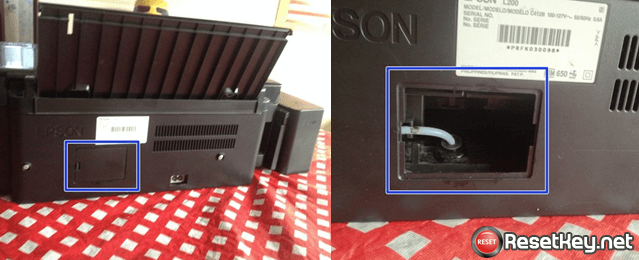
Open the cover and you can see the waste ink’s tube and the waste ink’s sponge in waste ink pad as the picture below.
When you see the waste ink pad of the Epson R1900 you need to disassemble the shell but the cover is smaller than the waste ink pad so you must to be careful when do this, I think the best thing is the fixer’s help.
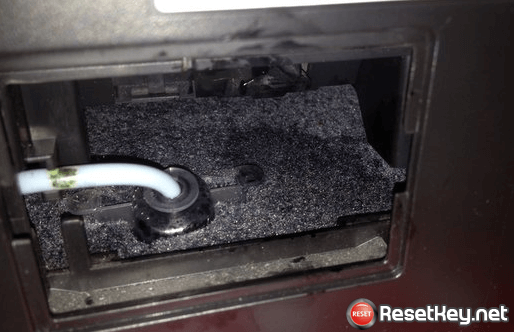
Let’s see the step 2 because you can’t always open the Epson R1900 printer to clean the waste ink pad or replace it.
Step 2: Separate the waste ink tube out of the Waste Ink Pad:
When you find the Waste Ink Pad of the Epson R1900 printer and the waste ink tube, you can use a tool to separate the waste ink tube iut of the waste ink pad. Please move everything softly and carefully to prevent the damage of the tube.
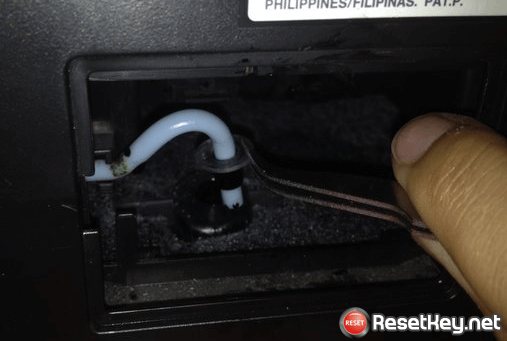
Be gentle and careful to avoid folding or cracking waste ink pipes of Epson R1900 printer.
Step 3: As you can see in the picture, use a cylinder to suck the waste ink of the Epson printer. After that clean the waste ink tube and absorb the waste ink out of the Waste Ink counter.
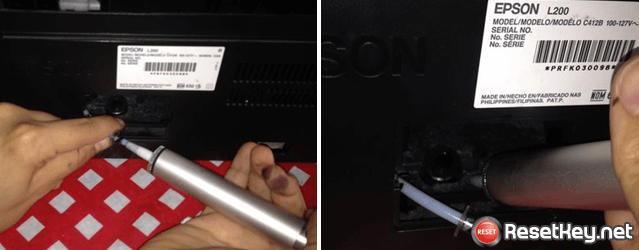
You also have to suck the waste ink form the sponge in case the Epson R1900 printer is new one you can skip this step but not for the old printer because the old one can be overflow the waste ink while the transferring process is occurring.
By this way, don’t worry about the waste ink overflowing when you don’t use the bottle to contain the waste ink. However, you have to check and suck the waste ink regularly so I think you should use a bottle to collect the waste ink.
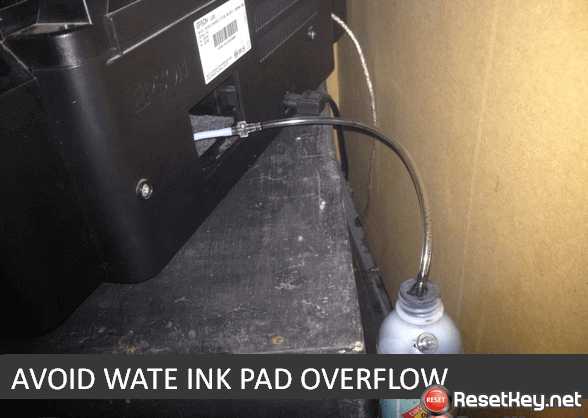
Step 4: Install the bottle out of the printer
You need:
– A bottle made from plastic or glass.
– A relative tube is as equal as the tube of the printer.
– The tube connection tool.
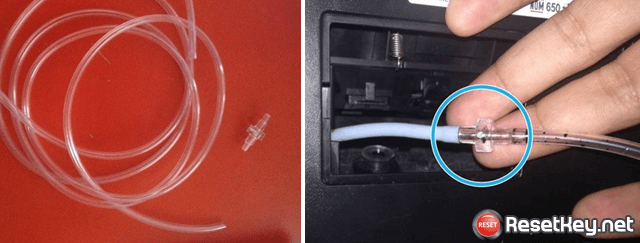
You can see in this picture to know how to install and assemblr all the component together to avoid the Epson R1900 printer’s waste ink pad overflow.
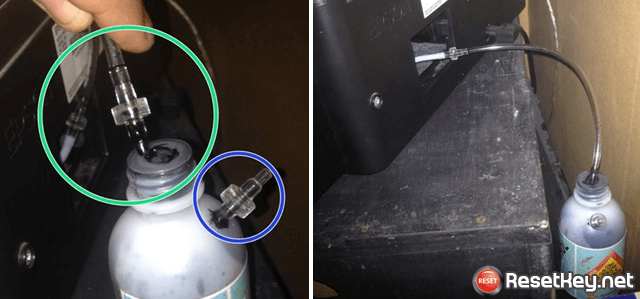
Now you can try printing some contents and check the waste ink flow into the bottle or not.
When the bottle is full of waste ink you can bring it to clean then go on using.
Watchout: This is an good solution and you can use it in a long-term but you should use a tool called WIC RESET TOOL to reset Epson R1900 printer’s Waste ink counter when it overflow. You can see to install this software in our other post.
Thank you for your seeing article “How to avoid Epson R1900 waste ink pad overflow”.
