To use the wic utility reset utility and reset the waste ink counter many times and to avoid the waste ink pad being overflowed, follow the following tips and you will save your printer.
The Epson printer and similar ink tank models are great, the ink replacements are very efficient and let you print much more for the money it costs replacing them. The big flaw is the waste ink pad.
Epson Waste Ink Pad Overflow problem and solution to deal with it
The printer has a limited amount of times that it can clean the printer’s nozzles and do a power ink flush to clean the printer heads. Once the printer reaches it’s limits it’s software will block you from printing on any computer. Now this is to protect the waste ink pad from overflowing with waste ink but the printer is designed in a way so that it is very hard to replace it.
How to deal with Epson Waste Ink Pad Overflow problem
How to reset waste ink counter
First you need a software that is available online from many sites to reset the waste ink pad error counter on your printer. Download here
– Buy the reset key here ($8.99/key) – https://resetkey.net/buy
And after that you can follow this guide to do this. https://resetkey.net/howtoreset
Step to steps on how to fix Epson Waste Ink Pad overflow problem
Step 1: How to check and locate the Epson Waste Ink Pad
A wild Epson Printer appears.
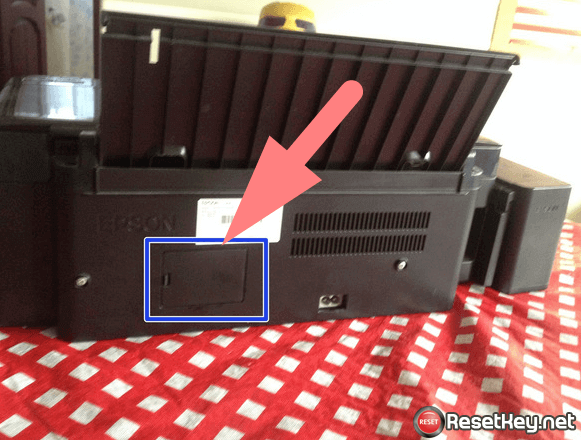
Turn it around and look for a small door.
Step 2: Locate the small door on the back and open it.
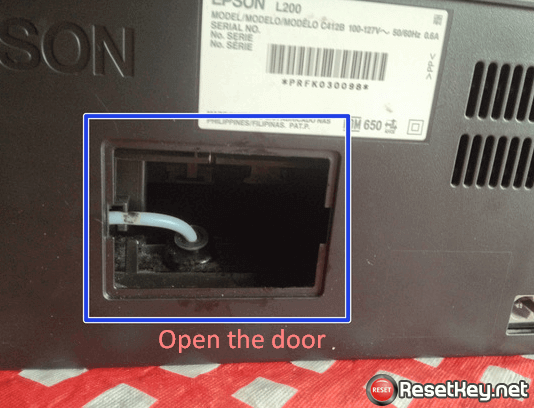
You will find the tube that drains the waste ink to the ink pad.
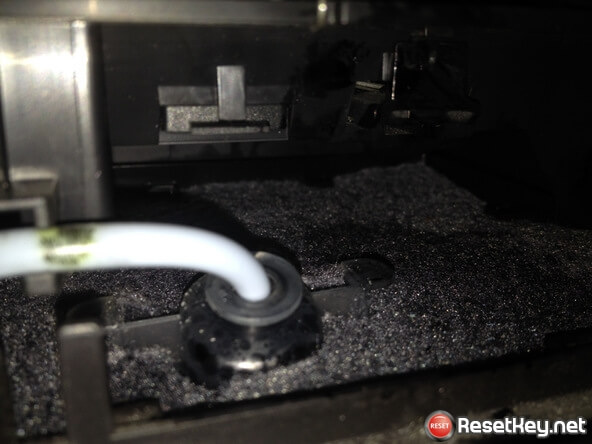
Step 3: As you can see, the pad is full with waste ink and is larger than the small door that gives you access to it, meaning it is not meant to be changed by mortals.
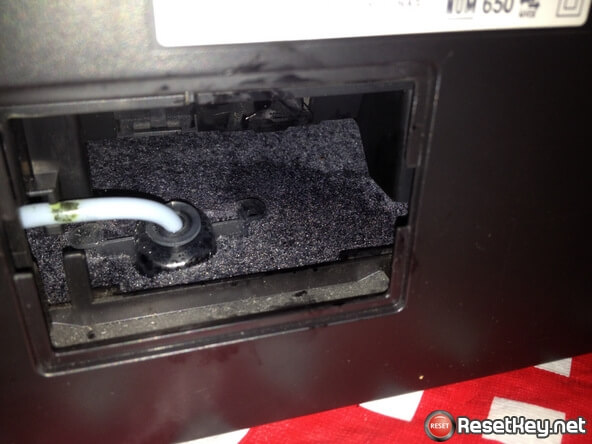
Step 4: With a pair of tweezers gently pull the ink tube from the ink container.
Be careful not to grab it from the tube so as not to damage it.
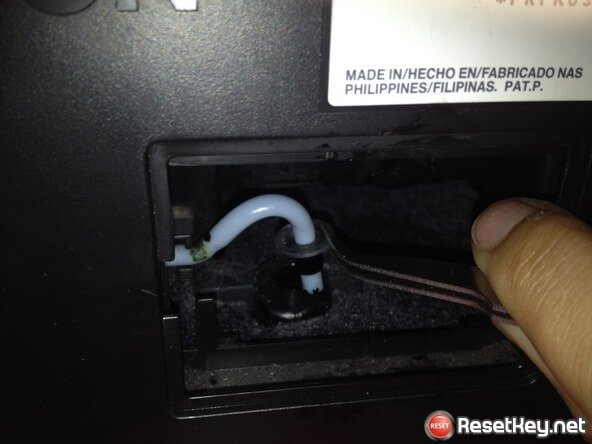
Step 5: With the help of a syringe or anything that can suck liquid, clean the remaining ink from the tube.
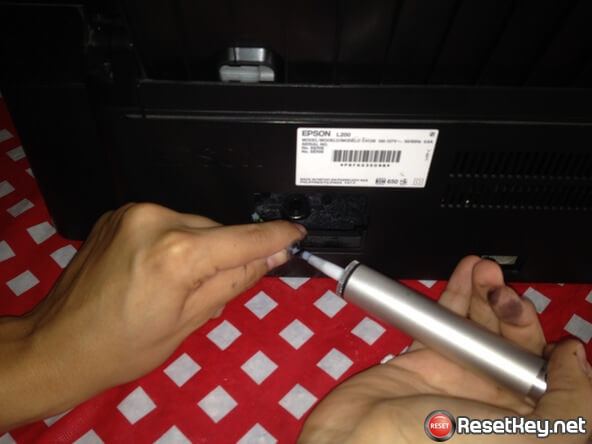
I also went ahead and cleared the pad from as much ink as I could, it can buy you a bit more life span to the pad if you are in a hurry to print and not have the replacement items for this solution.
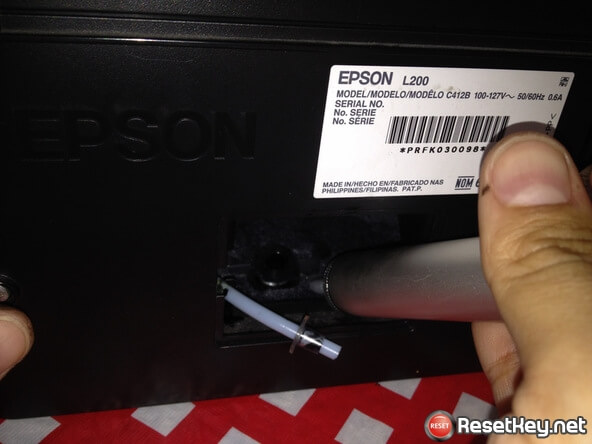
Step 6: Cut a 6″ piece of the aquarium tubing and grab a connector.
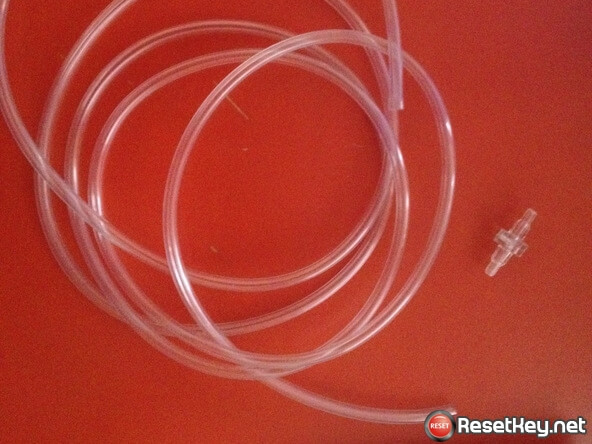
Connect the printer tube to the aquarium tubing you just cut with the connector.
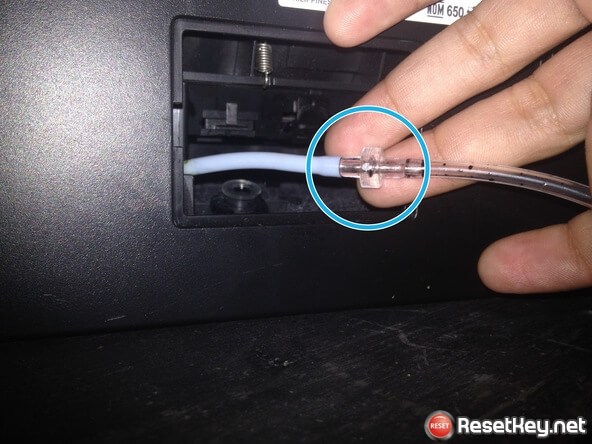
Step 7: Put a connector on the end of the aquarium tube and connect it to the top of the bottle. Make sure that there is no chance of spilling or else you will have a big black spot of ink under your printer.
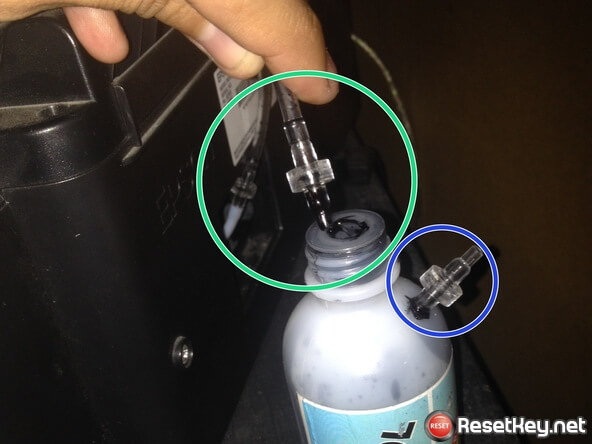
I inserted another connector on the top side of the bottle to release any pressure created by the ink coming in and the air in the bottle.
Step 8: I placed the bottle in a lower elevation than the Epson printer so that the ink can travel down the tube easier.
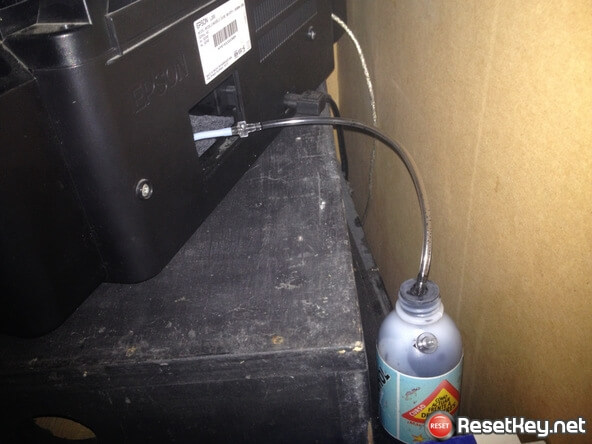
Check periodically to empty the waste ink bottle.
Hope this article will help you save money because you do not have to buy a new printer. This is a great trick and do not forget to share it with your friends.
By: Angela Penaherrera
Source: https://www.ifixit.com/Guide/How+to+Hack+Epson+L200%27s+Waste+Ink+Pad/41022#comment-449046

Comments