After resetting the waste ink counter on the Epson ET-2720 printer, you will need to inspect the waste ink tank and clean the waste ink pads if they are too dirty and at risk of causing waste ink overflow.
Why should you clean the waste ink tank of the Epson ET-2720 printer after resetting the waste ink counter?
– The waste ink counter helps the printer know when to stop operating to prevent waste ink from overflowing out of the printer. When the waste ink counter reaches 100%, it means the waste ink tank is nearly full.
– When you use the WIC Reset Utility software to reset the waste ink counter to 0%, the printer will continue operating without knowing that the ink in the collection tank might overflow. Therefore, you need to manually inspect and clean or replace the waste ink pads.
Guide to cleaning the waste ink pad for Epson ET-2720 printer
The printer may continue working for some time after resetting without needing to replace or clean the waste ink pad. However, to be safe, you should take time to check the waste ink pad to see if its current condition requires immediate replacement or cleaning.
You can follow the instructions in this article to reset the waste ink counter on your Epson ET-2720 printer if it’s overflowing: How to reset Epson ET-2720 waste ink counter.
The importance of cleaning the waste ink tank.
– Prevent waste ink overflow and save costs:
+ Cleaning the waste ink tank of the Epson ET-2720 printer after resetting the waste ink counter helps prevent ink from overflowing and soiling the printer, thereby avoiding damage to internal electronic components and ensuring stable printer operation
+ Timely cleaning of the waste ink tank helps reduce the risk of early component replacement, avoids repair costs due to waste ink incidents, and helps extend the printer’s lifespan.
– Extend printer life and ensure print quality:
When the waste ink tank is nearly full, cleaning it helps minimize the risk of waste ink system blockage, prevents waste ink from flowing back to the printhead, and helps keep prints clean without color smearing.
– Ensure safety for users and the environment:
+ If waste ink overflows, users may come into contact with harmful printer ink, endangering the health of printer users, and leaking waste ink also increases the risk of electrical leakage, making the work environment unsafe.
+ Additionally, when ink spills, it causes environmental pollution and affects the workspace.
Guide to cleaning or replacing the waste ink pad for Epson ET-2720 printer
– Ensure safety during the process. If you’re not confident, seek help from someone experienced. When cleaning the waste ink pad, wear full protective gear including: Gloves, safety glasses, face mask, and prepare containers for waste ink.
– Be mindful of environmental protection when disposing of waste ink.
Here are the steps you can follow to clean the waste ink pad of your Epson ET-2720 printer by yourself.
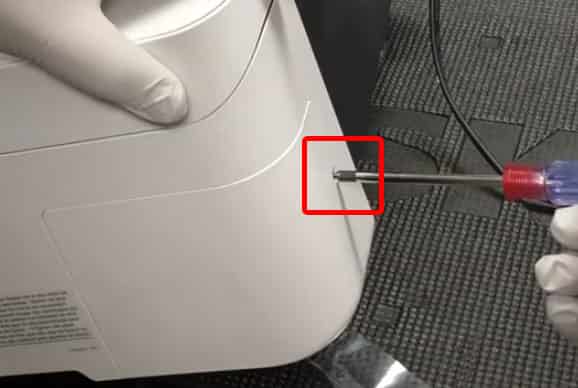
Step 1: Remove the waste toner container protective cover.
The waste toner container protective cover is located on the rear right side of the printer when viewed from the front. Use a Phillips head screwdriver to remove the securing screw as shown in the image below:
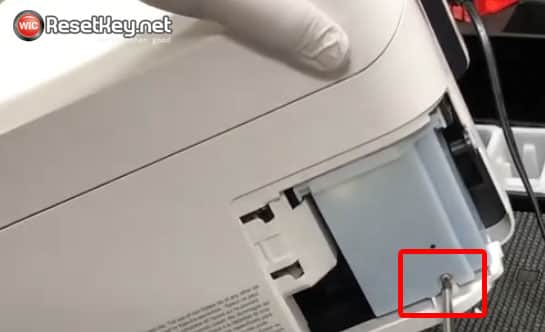
Remove the cover of the waste ink tray, then unscrew the screw that secures the waste ink tray as shown in the image below:
Now, take the waste ink tray out of the printer.
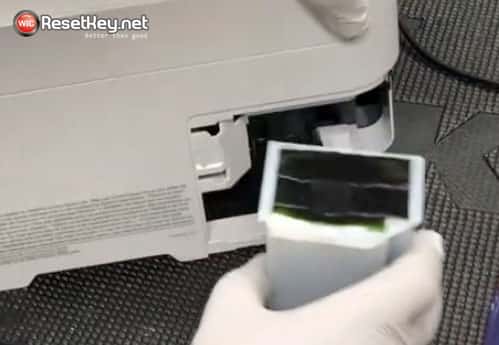
Step 2: Clean the waste ink absorption pads
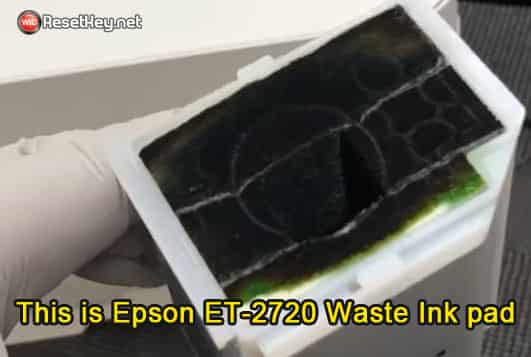
If you notice that waste ink has heavily blackened all the absorption pads as shown in the image below, you need to clean them immediately:
If you see that the waste ink absorption pads are still clean with minimal ink accumulation, cleaning may not be necessary. However, if you have time, it’s recommended to clean them to avoid forgetting later.
Take note of the positions of the waste ink absorption pads, then remove them and clean them under running water.
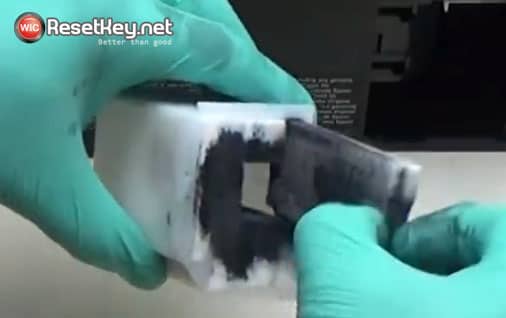
After cleaning all the waste ink absorption pads, dry them by sunlight exposure, using a dryer, or a centrifuge if available.
Step 3: Reinstall the waste ink absorption pads in their original order.
Then reinstall them in the printer, secure with screws and cover.
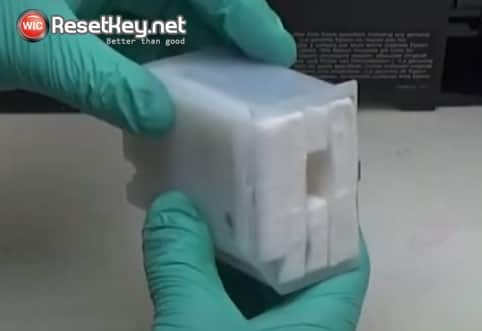
Note: You can always purchase new waste ink trays online for replacement if you want to avoid getting your hands dirty and don’t have much time for cleaning and drying.
You can expand the waste ink tank to reduce cleaning frequency
You can easily expand the waste ink tank by directing waste ink to flow directly into an external waste ink bottle. When this bottle is nearly full, you can simply remove it, dispose of the waste ink, then reattach it and continue using the printer without any complex disassembly procedures.
You can follow the instructions in the image below:
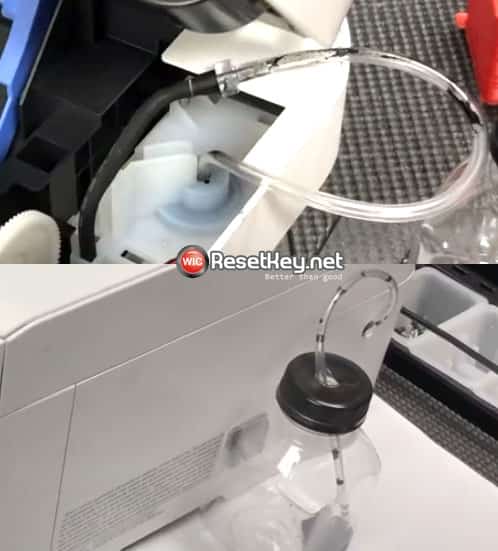
You can either purchase suitable tools for installation or make use of items you already have. However, make sure all connections are tight to prevent ink leakage.
