
How to fix error: There is no maintenance of Epson printer in printing preferences box
If you can’t find the “Maintenance” tab when opening “Printing Preferences” on an “Epson printer”, it’s usually caused by an outdated, corrupted, or Windows-default driver. The most reliable basic fix is to “remove the current driver” and “install the latest official Epson driver”.

Before reset Epson printer waste ink counter for fix Epson waste ink counter overflow error by WIC Reset Utility tool (download here), with some model you have to Disable the Epson Status Monitor Utility, but when you try to Disable the Epson Status Monitor Utility you can not find Maintenance tab like the guide. Please follow the steps below to fix this problem.
Fix no maintenance tab in Epson printing Preferences
Best Basic Solution (Recommended): Reinstall the Latest Epson Driver that download from Epson official page.
For those who don’t know what is WIC Reset Utility Tool: WIC Reset Utility tool or WICReset is used to reset errors: The Printer’s Ink Pads at the end of Their service life, red light blinking on Epson printer. You can learn how to reset Epson Printer Waste Ink Counter here: how to reset waste ink counter
Step to steps to fix no maintenance tab in Printing Preferences
Tip: Prevent Windows from replacing the driver: After installing the Epson driver, avoid using “Add device” with Windows generic drivers. Always install using Epson’s installer to keep the Maintenance tools.
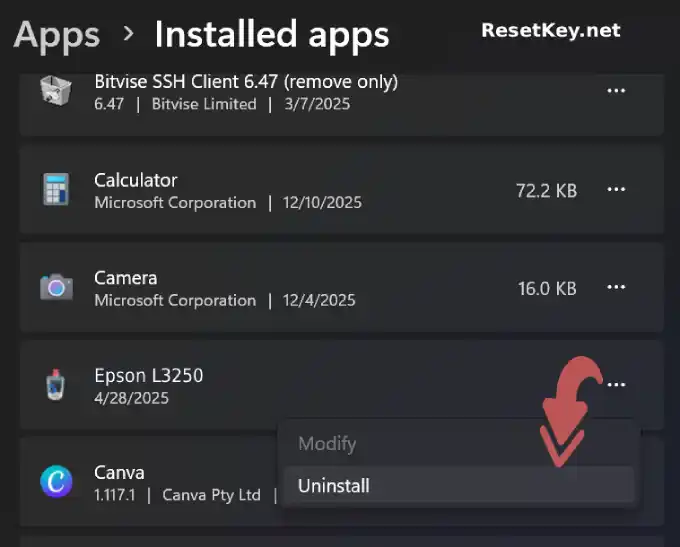
Step 1: Uninstall the current Epson printer driver
1. Open “Settings” → “Bluetooth & devices” → “Printers & scanners”.
2. Select your “Epson printer model” → “Remove”.
3. (Optional but helpful) Open “Control Panel” → “Programs and Features” and uninstall Epson software/driver related to your model.
Step 2: Download the latest driver from Epson (official)
1. Go to the “Epson official Support website”.
2. Search your printer model (example: “Epson L3150”, “Epson WF-2830”, etc.).
3. Download the “latest driver” for your Windows version (prefer the full driver package if available).
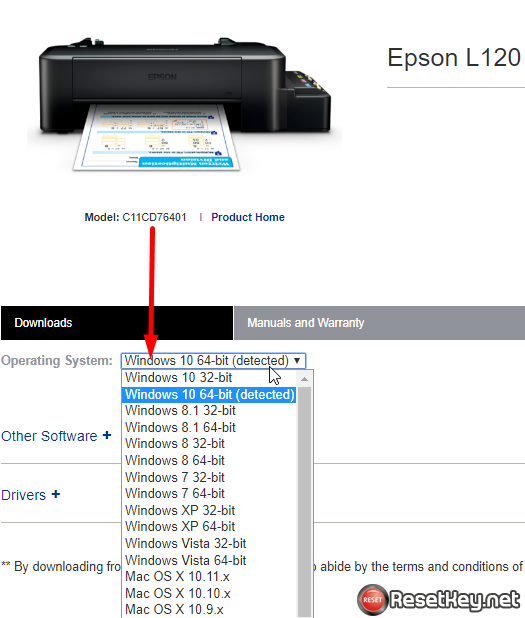
Choose the driver version appropriate for your operating system.
Step 3: Install and restart
1. Run the downloaded installer.
2. Follow the on-screen steps to complete setup.
3. Restart your PC.
4. Open “Printing Preferences” again and check for the “Maintenance” tab.
The reason why you need to access maintenance tabs
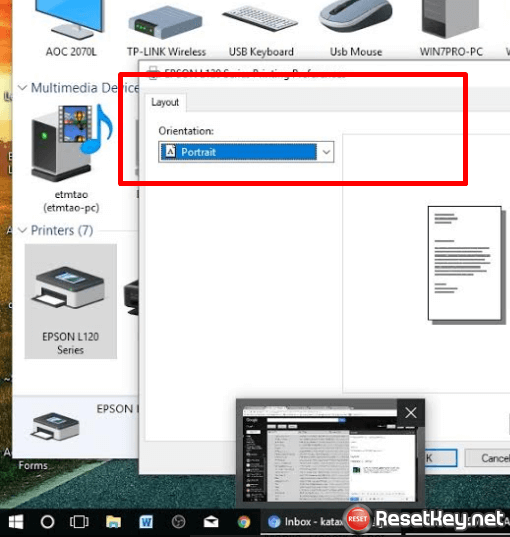
+ Changing Epson’s Default Layout
It’s very necessary to connect Maintenance tab to turn the default lay-out when you look into your printer. You must go to “Windows Extended Setting” when using Windows 10 OS. On the other hand, another way is going to Control Panel, then Under Hardware and Sound and next click “View devices and Printers”.
+ Run Print Head Clean
Have you ever seen the problem such as cartridge getting stuck, the quality of printing falling bad like color is not printing or prints a lot? It might be there is wrong thing in the print head. In case this problem can be repaired fast and easily by connecting click button on the printer properties. But this can make it difficult to use if there is nothing called maintenance tab in printing at all.
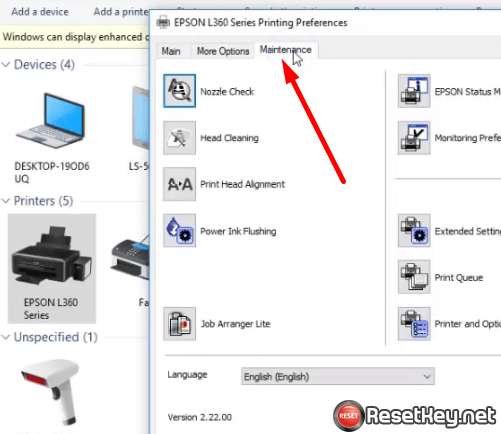
Useful Utilities under the Maintenance tabs
A computer user can use amount of utilities for different points. There are many of those such as: Status Monitoring, Nozzle Check, Head Cleanings, Print Head Alignment and Printer and Option Information.
If you also have any queries, please go to the https://files.support.epson.com/htmldocs/r220__/r220__rf/softw_4.htm
+ Disable Epson Status Monitor Utility for run Wic Reset Utility and reset Epson Waste Ink Counter overflow error. You can read more here – Disable the Epson Status Monitor Utility
If you have any question, don’t hesitate to contact us
Good luck!